Fetch Tabs
Documentation
Fetch Tabs

App Layout
The Fetch app is divided into several navigation tabs which can be observed on the far-left hand side of the application. From top to bottom the pages are (1) user information, (2) search, (3) the home page, (4) favorites, (5) browse, (6) project tab, (7) contact us, (8) website link, and (9) sync button.
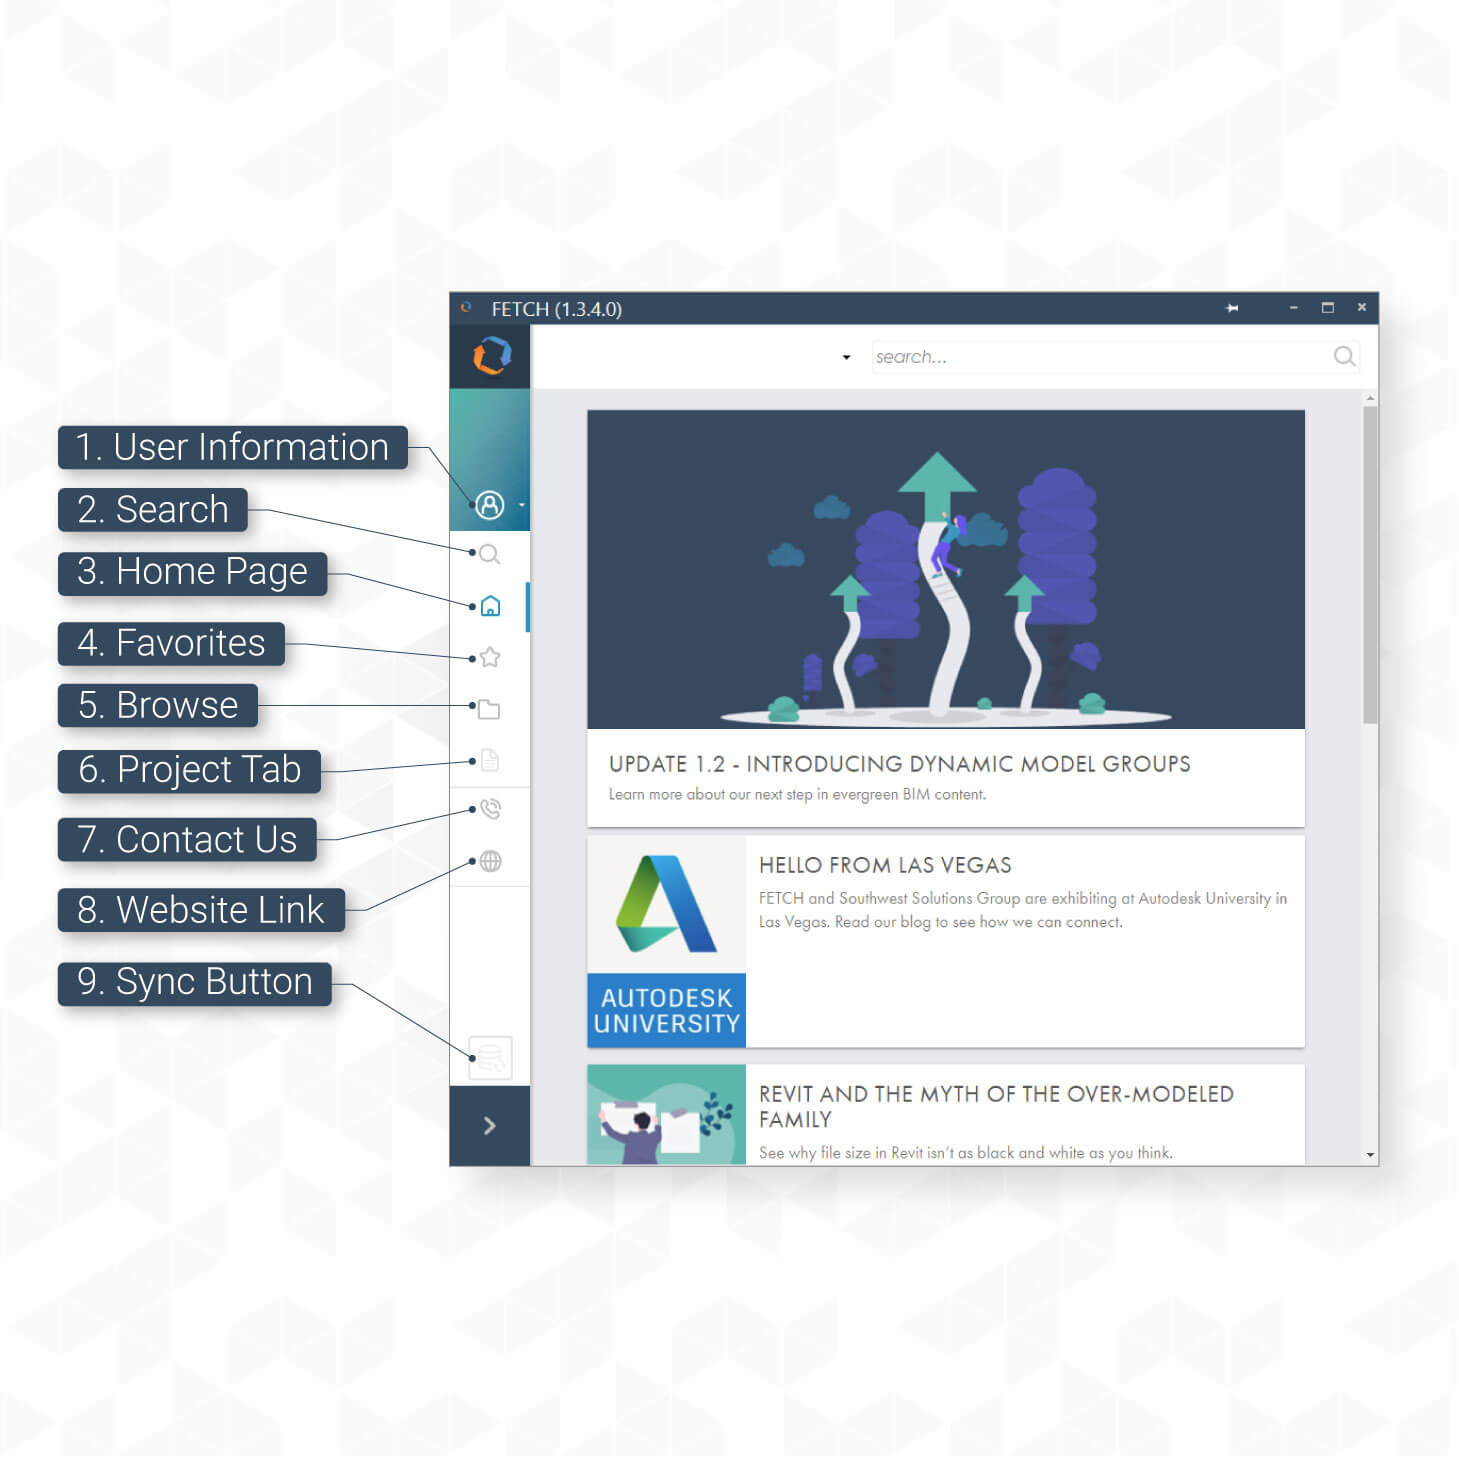
- 1. User Information: This drop-down menu quickly shows the account that is currently signed in and gives buttons to access account management or to sign out.
- 2. Search: The magnifying glass icon will bring you to the search page. Type in the desired keywords into the search bar at the top right and hit enter to refresh the page with search results. Please note that the search bar is available on all Fetch pages and will take you to the search results page automatically when used.
- 3. Home: This page is the default page when Fetch starts, and it is a hub for useful information. At the top, recent blog posts are available for reading more about the app, our design philosophy or any news about the team. Below the blog posts are the newest families and newest model groups shown in carousels. The ten most recent families or model groups will appear here when they are made public by the content creation team.
- 4. Favorites: This page will display only models you have favorited. This handy feature keeps frequently used models at hand without having to search or browse. To add a family to your favorites, simply click the star icon at the top right of any family card. Alternatively, you can click the three vertical dots to open the options menu and select “Add to Favorites.” For more information, see the favorites section of the Content Management chapter.
- 5. Browse: This tab is the heart of Fetch; the model library. The Fetch app provides users several ways to browse content. Much like browsing the website, a user may browse families and model groups by Revit category, by product types, or by markets. Browsing by product types is useful when looking for a specific piece of furniture or equipment, such as lockers or shelving. Browsing by markets will only show curated families and model groups intended for use in specific environments. For example, a medical equipment planner can find everything they need by browsing in the Healthcare market.
- 6. Project Tab: Only active when a project is open, the project tab keeps a list of the Fetch models currently in the Revit project. This tab is not only useful for keeping track of what families are in the project, but also for keeping models up to date. When an update is made, the family card in this tab will show a notification and give you the option to update. To learn more about Fetch’s update feature, see the chapter on Content Management.
- 7. Contact Us: This button will open a new browser tab to our contact page on the FetchBIM site. When encountering an issue, bug, or model problem, please do not hesitate to fill out the form and a Fetch team member will respond shortly.
- 8. Website Button: This button will simply open a new browser tab to the FetchBIM home page.
- 9. Sync: When pressed, the sync button will retrieve and inject all the information in our database about the models placed in your project. This information can include product codes, budget pricing, approximate weight, and updated links to CSI and spec guides.