Modify First Family

- Once the family is placed inside your file you will be able to edit and configure it as you desire.
- Click and highlight the family you have just added to your Revit project file.
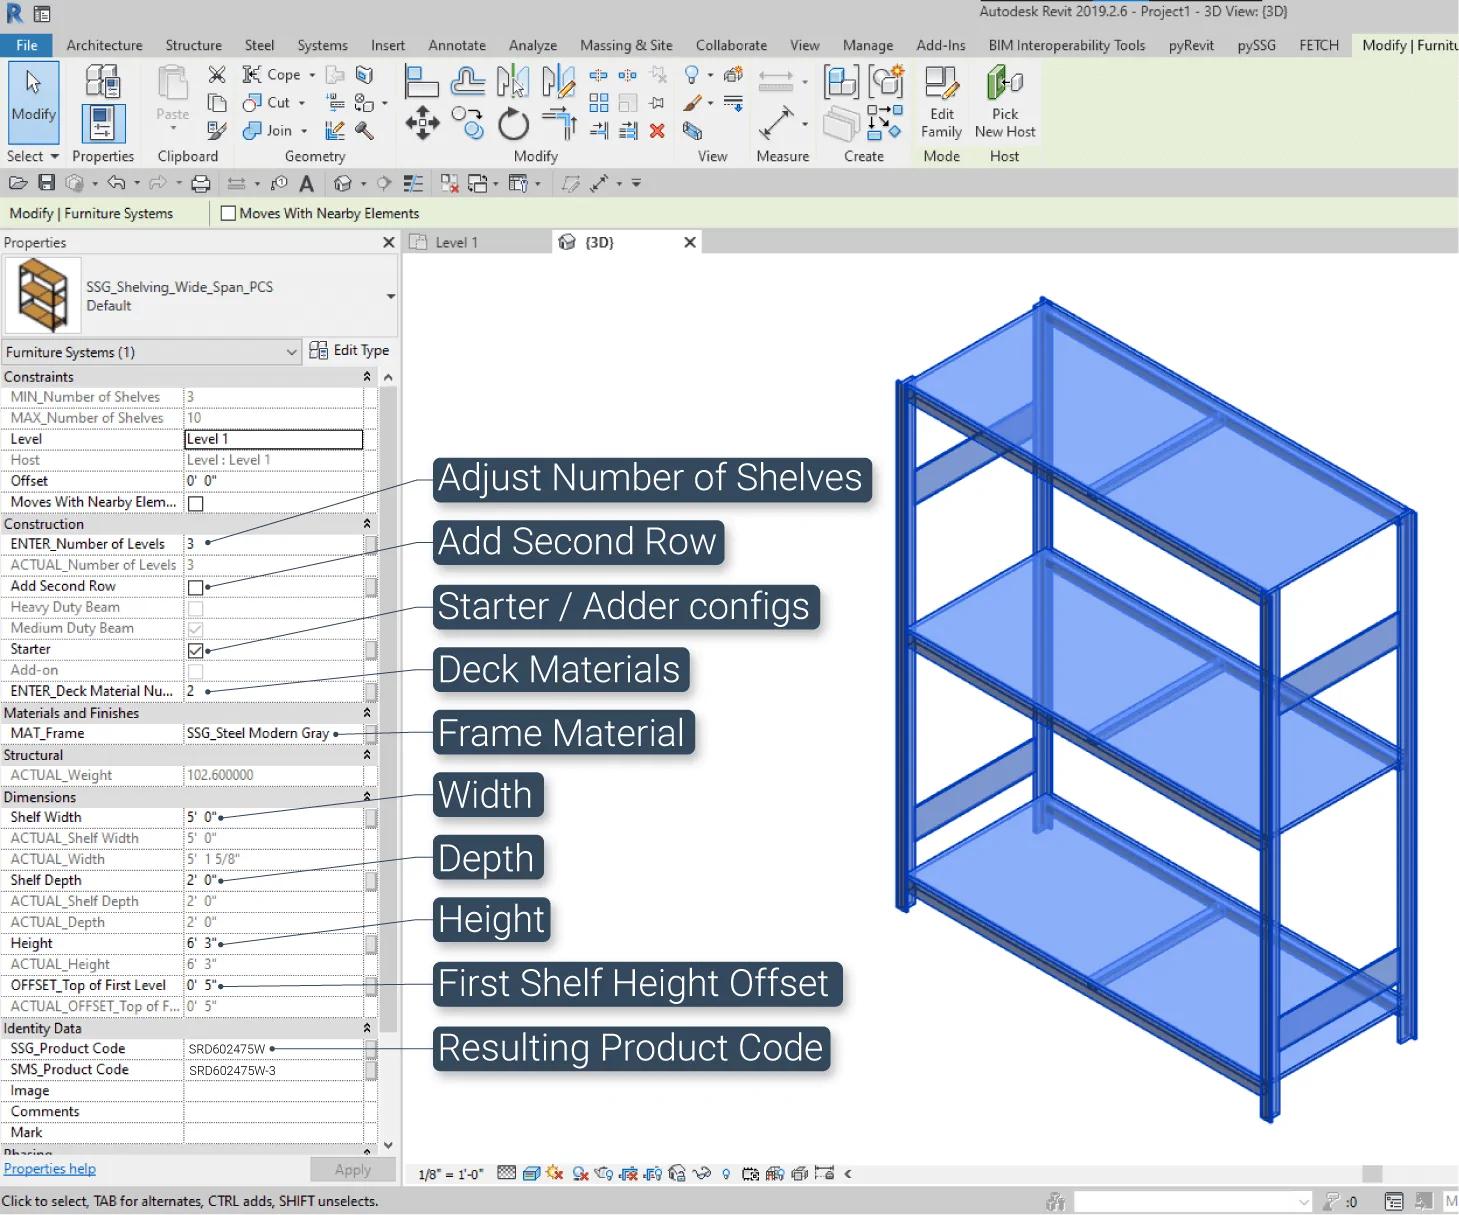
- In the Properties window, all the instance parameters for this family are visible. You will notice that each editable parameter starts with a prefix that denotes the kind of operation that parameter will perform. The most commonly used are:
- ADD_: Add or take away a feature or sub-component. For example, ADD_Locks.
- MODIFY_: Directly change an aspect of the model. Usually paired with a sister parameter. For example, MODIFY_Starter/MODIFY_Adder.
- ENTER_: An open input for a length or an integer such as ENTER_Width, or ENTER_Number of Shelves. These parameters are always paid with an ACTUAL_ parameter.
- ACTUAL_: A data validation parameter to ensure inputs are valid. For example, a casework model can be 24-48” wide. If ENTER_Width is equal to 52”, then ACTUAL_Width will display 48”.
- MAT_: A material parameter. Most families include a MAT_Base (such as plywood) and a MAT_Finish (such as high-pressure laminate). These can be filled with any material currently in your project.
- Start by entering a new width into ENTER_Width and click “Apply”.
- Play around with other options to get a feel how complex configurations can be set up.
Up next

First Sync
In order for the information in the master schedule to be accurate, you will need to perform your first sync to our content database.