First Sync

In order for the information in the master schedule to be accurate, you will need to perform your first sync to our content database . This sync will input product codes, check budget pricing, and input current long and short descriptions.
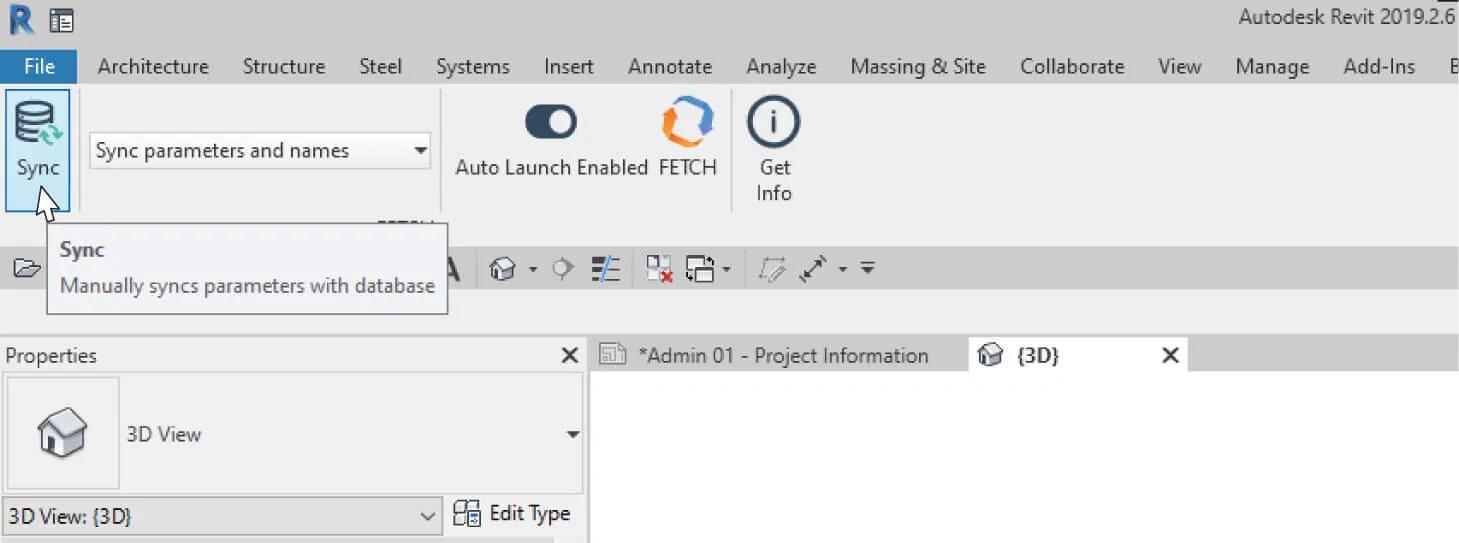
To perform a sync:
- Navigate to the Fetch tab in the Revit ribbon.
- Click “Sync”
- Wait for the sync to finish. This may take a few seconds.
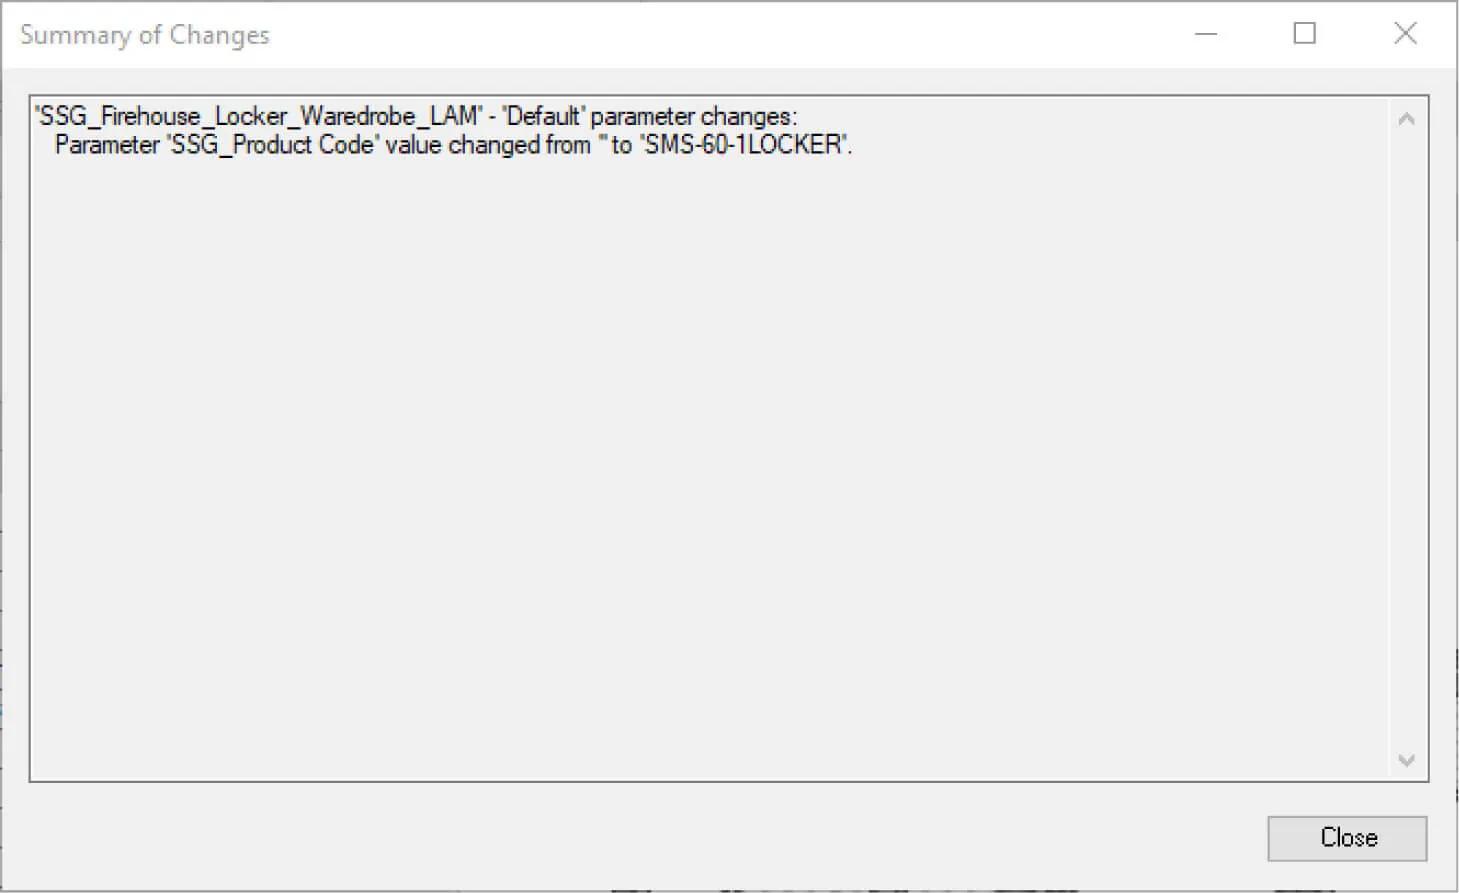
- When the sync is complete, a small dialogue window will appear stating that the sync is complete. You may click on “View details” for a more detailed print-out of the updated parameters.
- Click “Close” and navigate back to the master schedule in the Project Browser. All inserted models should be scheduling with all the correct information.
Up next
Insert Master Schedule
With the Fetch app you are also able to insert schedules into your project.